When creating a Workflow keep in mind what is most important to you and how your business works. Pay attention to how Users will be performing in ClickPoint, to Manage Leads and organize the information they use and need the most.
- Workflow: Breaks down the Lead into subcategories of the Record Type; essentially where the Lead stands in the cycle of managing the Lead. (Leads, Client, Sold, Dead, etc.)
- Status: Typically where you are at with the Lead in the “sales process”. This further categorizes into labels such as New Lead, Attempting Contact, Contacted, etc. New Lead is for a brand new lead that has not been contacted as of yet, but is in the process of being contacted.
- Category: Groups together all Actions the User or sales team will see when in a Lead and needing to move it from one Status to another – this is done using the Actions you create. Having all Actions grouped together will allow ease of use when in the details of the Lead.
- Action: Operations that control what happens with the Lead. This automates the process of moving Leads between Workflows by changing Status and/or Action. Call – No Answer, Call – Set appointment, Sold, etc. An Action Description is the title of what you are doing with the lead, Left Message, Contacted – Scheduled Callback, etc.
- Tips and tricks for Actions: Actions will vary depending on the Status of the Lead. You more than likely won’t find the same Actions in a Sold Status as you would a New Lead Status. In New Lead you want to know where in the process the Lead is for being contacted. Did you call and leave a message? Did you make contact and the Lead asked for a second phone call scheduled for a later time? This will allow these Actions to move to the next step. Sold wouldn’t have those same Actions. Particular attention needs to be paid to how and when a Lead moves. You want to also include what is easiest for your Users or sales team to recognize as usable Actions.
Creating a Sales Workflow
Go to Settings – Setup Lead Routing – Step 1: Create a Sales Workflow.
This will open the Workflow to add additional Statuses and Actions or change the current standard Workflow.
To create a new Workflow:
- Select Create Workflow
- Name the Workflow and click the Enable/Disable toggle, the default is disabled. Once the Workflow is enabled the toggle button with display green and Enabled.
- Click the Create New Status button
- A modal will pop up and you will need to identify the following:Name the Status (such as Leads, Clients, Dead, Sold)
- Select a System Status
- Choose a Background Color and Text Color
- Click Save Status
- You now have the ability to Add Action
- Click the Add Action button
- Select a Category
- Name your Action in the Action Description box; see below to “Items within an Action”for descriptions of options available
- Click Save Action
- Click Options to create operations within the Action
- Click Change Status or Workflow to ON if you’d like the Action to move to another Status or Workflow
- Click Mark Lead as Called/Emailed to ON
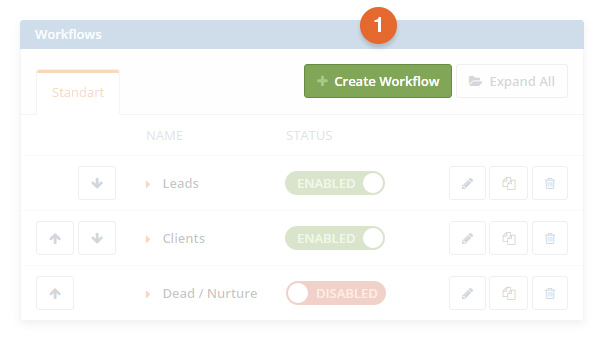
Image 1.1 Create a Workflow
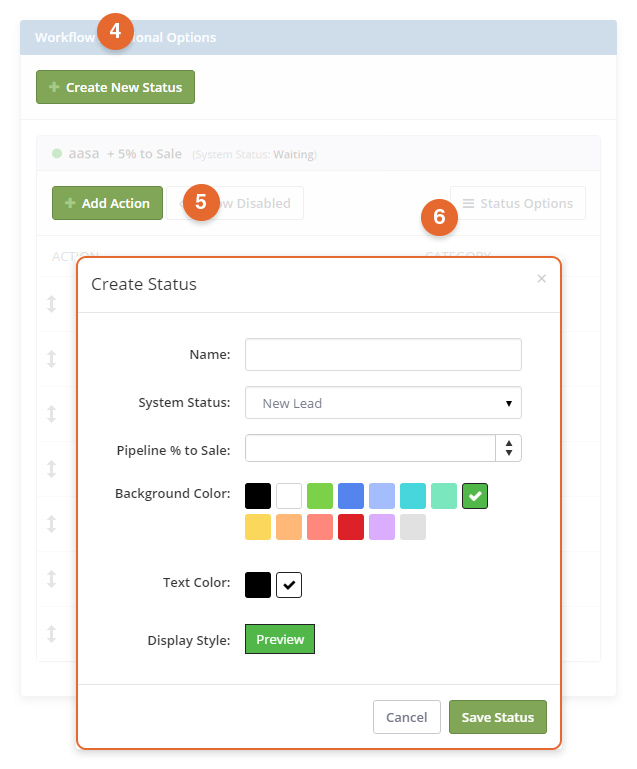
Image 1.2 Create Status
If Copying an existing workflow from a different lead/record type follow the below initial steps:
- Copy Workflow allows for the ability to Copy an entire Workflow
- Name the new Workflow
- Select from the drop-down which Record Type you are copying from; including all Statuses and Actions within the Workflow you are wanting to copy.
- Click Process to complete the copy.
- The newly named Status you copied will now open for you to edit.
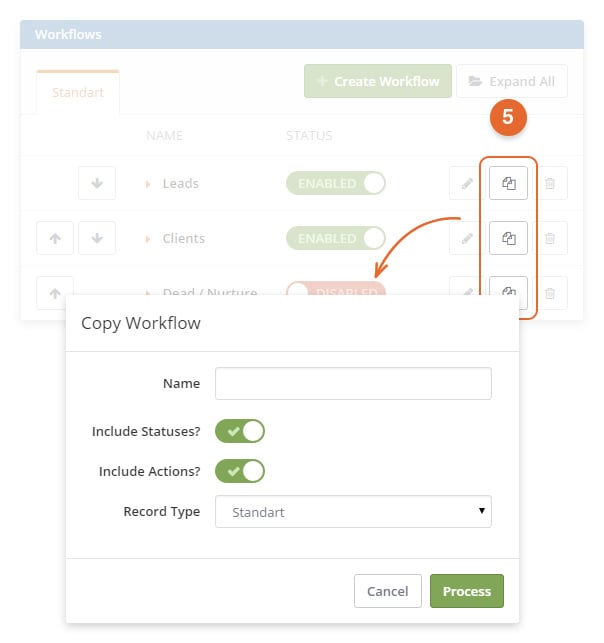
Image 1.3 Copy Workflow
Items within an Action available to enable for detailed Workflow Actions and Dispositions:
- Contact Type: This is the description to the left under Action Properties (Left Message, No Answer. Etc.)
- System Contact Type: Select an option from the drop-down.
Subject is typically labeled the same as the Contact Type Body and is typically left blank for Notes to be added later; however if you’d like to add Notes at this time you can.
- Add Note: Click ON if you’d like a Note modal as a requirement when managing a Lead, this will force a User to add a Note.
- Add Appointment: Turn ON if you’d like to add an Appointment. This gives options to label by Subject, and to select a pre-set length of time for the Appointment.
- Assign To: Select from a drop-down if you’d like someone other than yourself assigned to the Lead.
- Send Email Template: Turn ON if you have Email Templates created and select which Email Template you’d like to use to submit your Email.
- Set Email Nurture Strategy: Select from the drop-down which strategy you’d like to use.
- Transfer Lead: Turn ON and chose from a drop-down who the Lead should be transferred to, select ON/OFF for transfer to Parent or Siblings, and lastly turn ON/OFF the choice of Distribute after Transfer.
- Return Lead: Turn ON and add a reason for the return – this is typically not used.
- Release Pull: Add Days, Hours or Post-Appt Delay Minutes.
- Decrement Pull Count on Release: Turn ON/OFF
- Add Do Not Contact List: Turn ON/OFF Do Not Phone, Do Not Email, Do Not Mail and Do Not Knock
- Mark Favorite Lead: Turn ON/OFF
- Send Direct Mail: This should only be turned ON if you have Direct Mail Integration.
- Remove From Nurture: Turn ON/OFF
- Close Lead: Select yourself or another user.
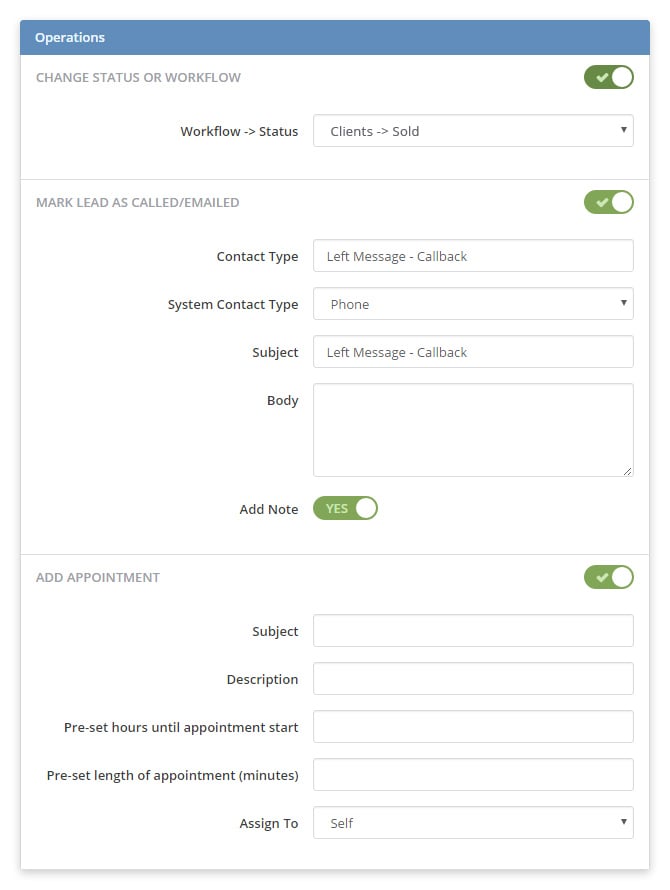
Image 1.4 Action Options
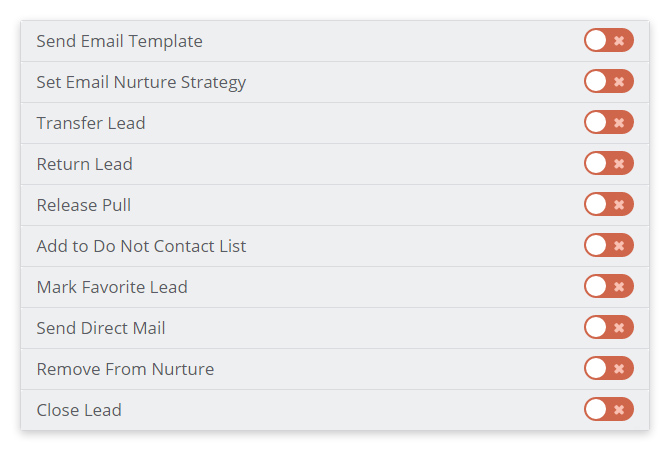 Image 1.5 Action Options
- As a final step, select Update Action (under Action Properties) once all operations are completed.
- Click the Back to Edit Workflows button to redirect to the previous page.
Note: Click Process or Cancel to finish (if selecting Process it may take a few moments to save.)